You’ve sifted the flour, you’ve warmed the water, and you’ve even gathered your collection of vegan-friendly ingredients. Crafting homemade vegan bread might seem like a daunting task, but it’s a process full of creativity and culinary exploration. This is not just about swapping out dairy for plant-based alternatives; it’s about understanding the chemistry of baking, the roles of each ingredient, and the subtle art of patience as your dough rises. Through this journey, you’ll not only be able to create a loaf that’s deliciously crusty on the outside and tender on the inside, but you’ll also gain a deeper appreciation for the art of vegan baking. So, shall we roll up our sleeves and get started?
Key Takeaways
- Vegan bread ingredients do not contain any animal products, including butter and milk substitutes.
- The dough is prepared by activating the yeast, mixing flour and salt, and allowing the dough to rise multiple times.
- The shape of the dough affects how the bread bakes, and it is recommended to keep the center slightly lower than the sides.
- The baking process involves preheating the oven, adding baking powder to the dough, and baking according to the recipe’s instructions. The bread can be stored at room temperature or frozen for future use.
Understanding Vegan Bread Ingredients
When making your homemade vegan bread, it’s essential to ensure every ingredient, from the vegan butter substituting for dairy butter to the plant-based milk replacing cow’s milk, is free from any animal products, including the yeast. It’s not just about swapping out non-vegan ingredients; it’s about embracing the opportunity to create a delicious and ethical bread recipe to make.
In this pursuit, you’ll find a wide range of vegan bread brands, yet nothing compares to the satisfaction of crafting your own loaf. The foundation of your homemade vegan bread recipe starts with all-purpose flour or whole wheat flour. Both options have their unique merits, with the latter imparting a hearty, robust flavor to your bread.
Next, a packet of active dry yeast dissolved in warm water will kickstart the fermentation process, giving your bread its characteristic rise. Remember, not all yeast is vegan-friendly, so double-check the label. Your dry ingredients – the flour, salt, and sugar, are then mixed with the yeast mixture and a dollop of melted vegan butter. The butter ensures your vegan bread has a tender, moist crumb that’s simply irresistible. So, go ahead, make vegan bread, and enjoy the fruits of your compassionate labor.
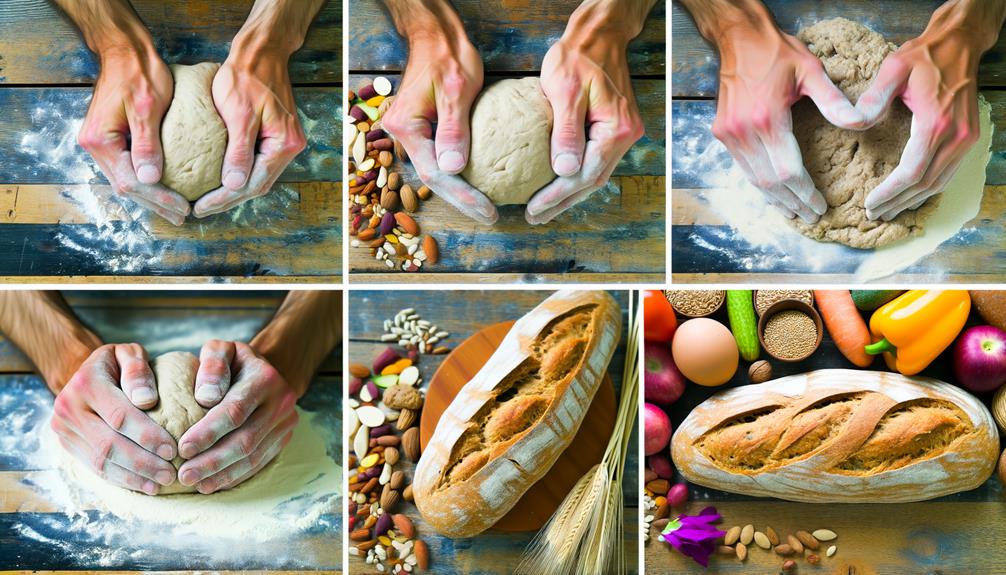
Preparing Your Dough
Let’s dive into the heart of bread making: preparing your vegan dough, a process that starts with activating the yeast. Here’s how you do it:
- First, let the yeast sit in warm water with a pinch of sugar for about 10 minutes. This step is crucial in bread making, as it ensures that your yeast is active and ready to work its magic on your dough.
- Next, mix your flour and salt together in a separate bowl.
- Slowly combine the flour mixture with your yeast mixture, ensuring that no dry bits remain. You’re now one step closer to your homemade bread!
- Finally, let it rise. Cover your dough and place it in a warm environment to rise for about an hour.
This simple yet effective process is the key to mastering the recipe of delicious homemade bread. After the initial rise, you’ll want to gently squish your dough to release any air bubbles, then let it rise again for another 30 minutes. This second rise is the secret to achieving that perfect, fluffy texture we all want in our homemade vegan bread. Happy baking!
Proofing and Shaping the Bread
After your dough has risen for an hour, you’re ready to move on to the next stages of proofing and shaping your vegan bread. This process is crucial as it determines the final texture and look of your bread loaf. The dough, with the yeast mixture already active, should be doubled in size.
Start by taking the bread dough and gently shaping it into your desired form. This could be a traditional loaf shape or something more unique. Remember, the shape will affect how the bread bakes, so keep the center of the loaf slightly lower than the sides.
Next, you need to let the dough rise again. Place the dough in a warm place, cover and let it sit undisturbed for about 30 minutes. This second rise, or proofing, allows the yeast to continue working, creating a light, airy texture in your final product.
Perfecting the Baking Process
Having shaped your dough and allowed it to rise, you’re now ready to focus on perfecting the baking process to ensure the ultimate vegan bread loaf. Making bread from scratch isn’t as daunting as it seems, especially with these step-by-step instructions.
- Preheat your oven and prepare your loaf pan. Line it with parchment paper for easy removal of your vegan bread at room temperature.
- Pour your risen dough into the mixing bowl, add baking powder and stir. This will help your bread rise even more during baking.
- Transfer the dough onto the baking sheet carefully, maintaining its shape. Remember, the more evenly shaped your dough, the more uniform your bread will bake.
- Bake according to your recipe’s instructions. If you don’t have a dutch oven, a regular oven will work perfectly fine.
Baking vegan bread isn’t just about following a recipe. It’s about understanding the ingredients, the process, and making adjustments as needed. Don’t be discouraged if your first few attempts don’t turn out perfectly. Like any skill, baking requires practice. So keep trying, adjust your methods as necessary, and before long, you’ll be crafting the perfect vegan bread loaf every time.
Storing and Serving Suggestions
Once you’ve crafted your perfect vegan bread loaf, it’s essential to know how to properly store and creatively serve it to maintain its freshness and maximize enjoyment. Let it cool thoroughly on a cooling rack to ensure that your homemade vegan bread retains its delicious texture. Storing your loaf of bread at room temperature is key. A clean kitchen counter or bread box serves as a perfect spot. Sealed in an airtight container, your yummy bread can last 3-4 days. Want it for longer? Freeze it for up to three months.
Serving your homemade bread can be fun too. Whether it’s warm or at room temperature, a slice of your vegan bread can be a versatile addition to any meal. Toast it for a satisfying crunch, or experiment by slathering it with your favorite spreads. Want more flavor in your bread? That’s doable too. Consider adding herbs or seeds to the dough before baking for a unique spin on the recipe. Let us know how you like your bread. That’s the joy of homemade vegan bread – it’s all up to you!
Frequently Asked Questions
What Are the Steps of Making Bread?
You’ll start by activating the yeast in sugar water. Next, knead your dough with chosen bread ingredients. After proper proofing, apply baking techniques. Once cooled, preserve your bread. Try gluten-free or multigrain varieties too!
How Does Vegan Bread Work?
You’re using vegan ingredients and yeast substitutes to craft a loaf that’s gluten-free yet maintains bread textures. It’s a cruelty-free baking method, adding healthy additions for flavor variations, considering allergens and nutritional values.
What Is the Best Bread for Vegans?
You’d find the best vegan bread in specialty stores, homemade recipes, or artisanal bakeries. Vegan sandwiches love sourdough variations with high nutritional content. Opt for gluten-free options or whole grains, using plant-based ingredients for a wholesome treat.
What Is the Secret to Making Homemade Bread?
You’ve got to experiment with yeast varieties, kneading your dough right, and understanding rising times. Mastering bread textures, choosing grains, hydration levels, and baking techniques are key. Don’t forget flavor additions and the fermentation process.